Tile Grout: Should You Just Clean or Completely Replace?
If you’re a home owner and haven’t taken the time to clean your bathroom tile grout in a while, chances are it’s looking pretty terrible. If the prior color of your grout was white, there’s also a chance that you’ll never be able to get it back to the original color, even with some high powered cleaning solutions.
Check the color and condition in some of the higher-traffic areas of the room. If you notice any chipping or cracking in the grout, it won’t respond well to cleaning and will most likely just break apart if you try to clean it with any kind of physical force. That means you should just make plans for replacing your tile grout, which means you can skip over to the Replacing Your Grout section of this article below.
Cleaning Solutions for Old Grout
If you notice that the condition and color of your grout isn’t too bad, it may respond well to a mild cleaning solution, such as concentrated dish soap mixed with warm water, applied with a stiff nylon bristle brush. After you’re done scrubbing, leave the cleaning solution on the grout and let it sit for 15 – 20 minutes. Then scrub again with more cleaning solution and then rinse with warm water. If the grout is still stained, repeat the previous two steps again with a higher power cleaning solution.
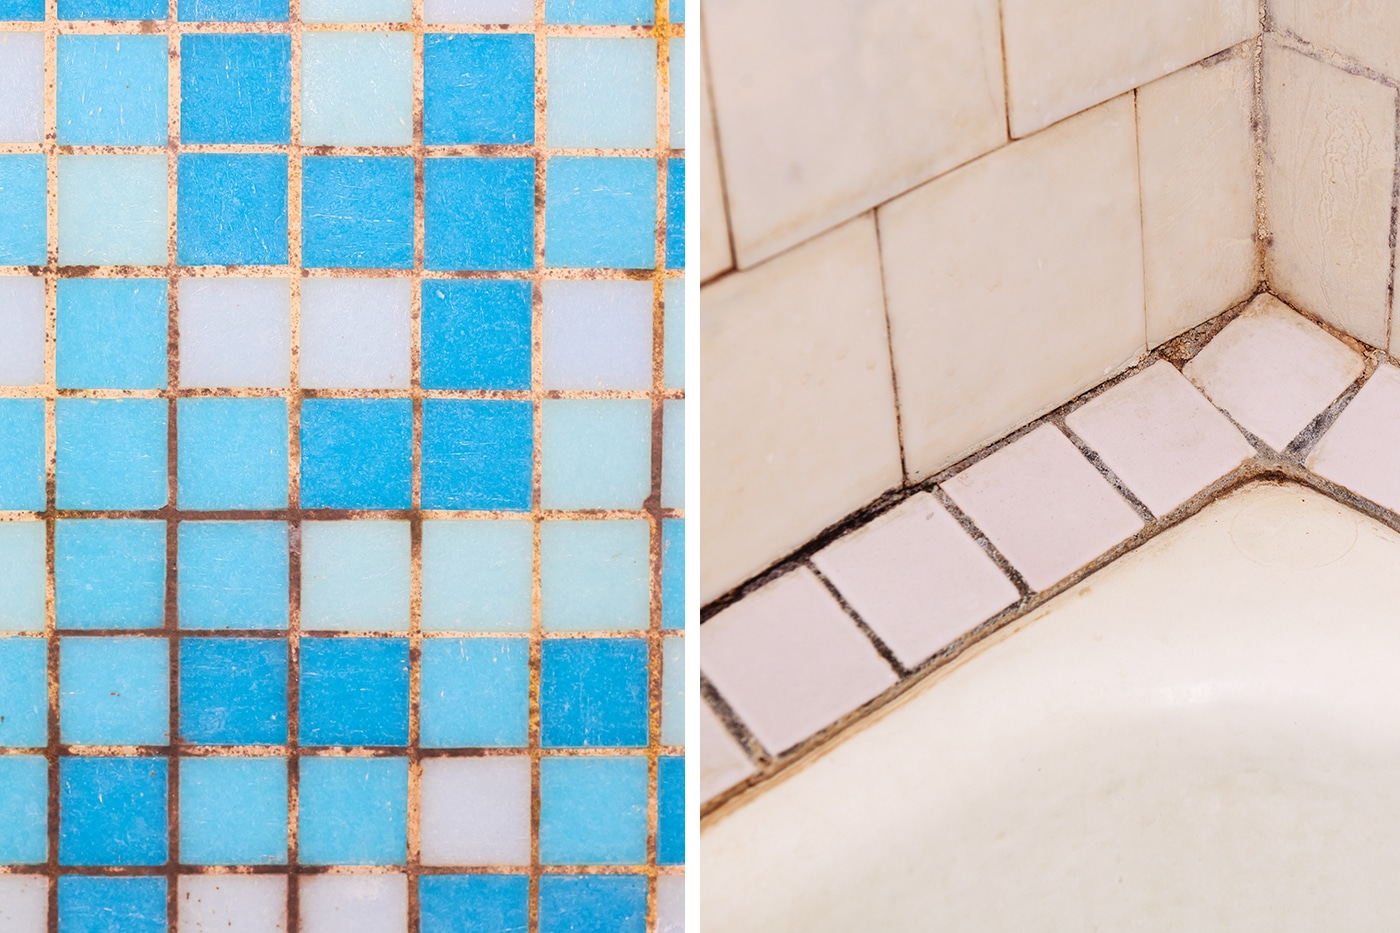
Closely inspect the grout in high traffic areas of the room. If it looks like the grout on the left that is just stained or has mold and mildew on it, a simple cleaning should get it back into shape. If it looks like the grout on the right, where it’s not only stained but also cracked and missing, you should plan on replacing all the damaged grout in your tile.
Grout Cleaning Equipment List:
- Plastic Bucket
- Rubber Gloves
- Stiff Nylon Bristle Brush
- Concentrated Dish Soap or Powdered Cleaner or Degreasing Cleaner
- Paper Towels or Cloth Towels
Replacing Damaged Tile Grout
One of the handiest tools you can use for this home project is the Milwaukee M18 18 Volt Cordless Oscillating Multi-Tool. However, keep in mind that you will need to buy the correct type of blade for this work, which isn’t included in the basic tool package. You can get that blade here: Milwaukee Grout Removal Blade.
Shop Milwaukee Oscillating Multi-tools
Fit M18 cordless Oscillating Multi-Tool with grout removal blade then turn on power at a low speed setting and apply to grout straight on.
The blade should remove the grout without a lot of pressure from you. Never force the blade; let it do the cutting along the grout lines for you. If you press too hard with the tool, there’s a chance you will breach the moisture barrier in your bathroom or kitchen.

Work slowly. If you try and rush, there’s a chance you can damage or chip the tile.
After you’ve removed as much grout as possible with the power tool, use a flathead screwdriver to knock out any loose pieces that are still hanging on. Apply even pressure with small strokes and don’t stab at the grout.
In another bucket filled with clean water and a large sponge, wipe down the surface of the tile to clean off any remaining grout from the tile and even out the new grout in the grooves.
Continue this process over the tiles until complete. Allow to rest for about an hour.
Come back with a new bucket of clean water and a clean sponge and wipe down the surface one more time to clean it up and then allow the new grout to cure for at least 12 hours with no traffic on the surface. It may require one last wipe down after the 12 hours.
Once you’ve removed the old grout, you are ready for replacing it with new mix.
Applying Grout, Cleaning and Finishing
Mix your grout according to the instructions on the bag. Remember that less water is better, so don’t over-mix water into the grout because you may ruin it. A dry grout mix has much better texture consistency. Make sure you mix up more than you’ll need, because making different batches may affect color matching.
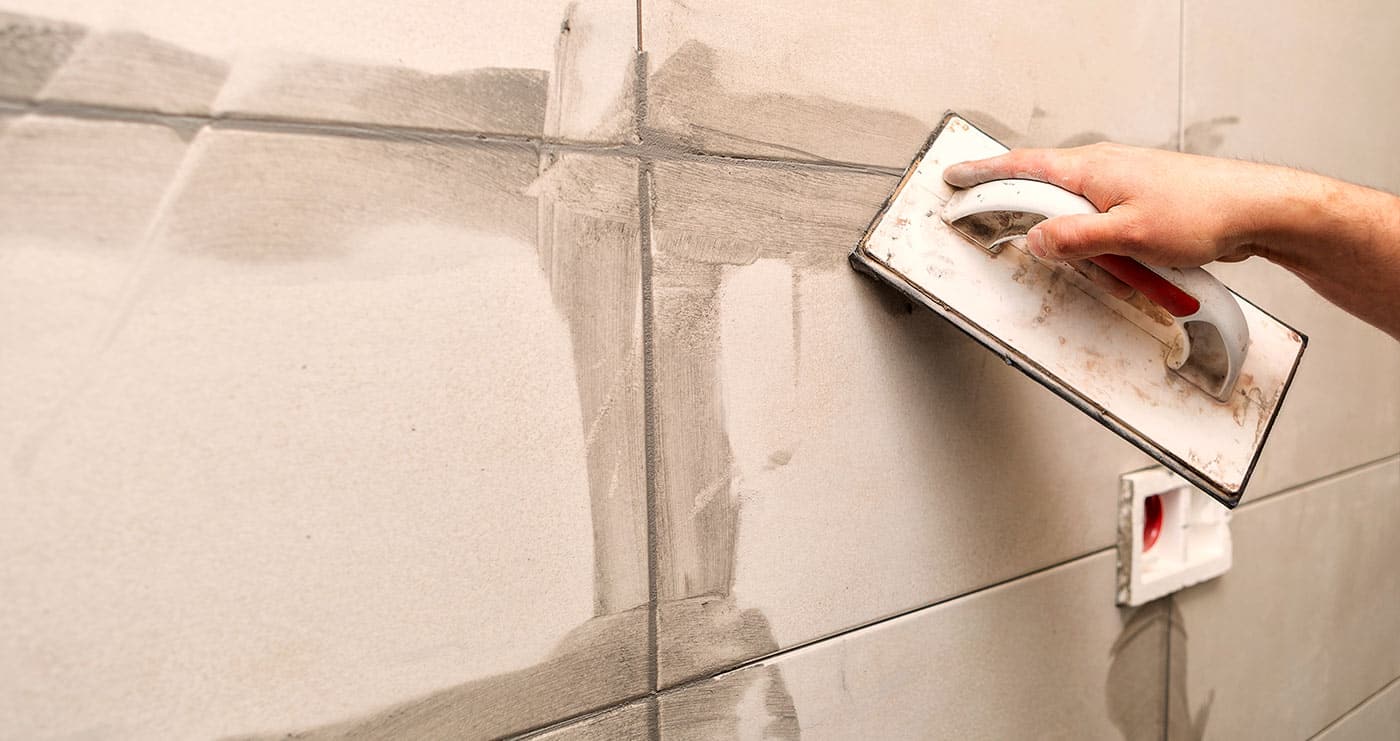
Angling your grout float is the best way to get grout seated from every angle.
Using a grout float, press the grout into the joints at a 45 degree angle from different directions. As you press and move the grout float, make sure you pass over several tiles, working completely into all the joints between the tiles. Working grout in large sections of tile will help you move faster and finish before your grout dries too much.
Once the grout sets for a few minutes (see the package for recommended time), wipe down the surface of the tile with a grout sponge that has only a small amount of water in it. You don’t want water dripping and making your grout too wet. You can also use a damp cloth if a sponge feels hard to control. Let your finished grout set for at least 12 hours before using the area normally.
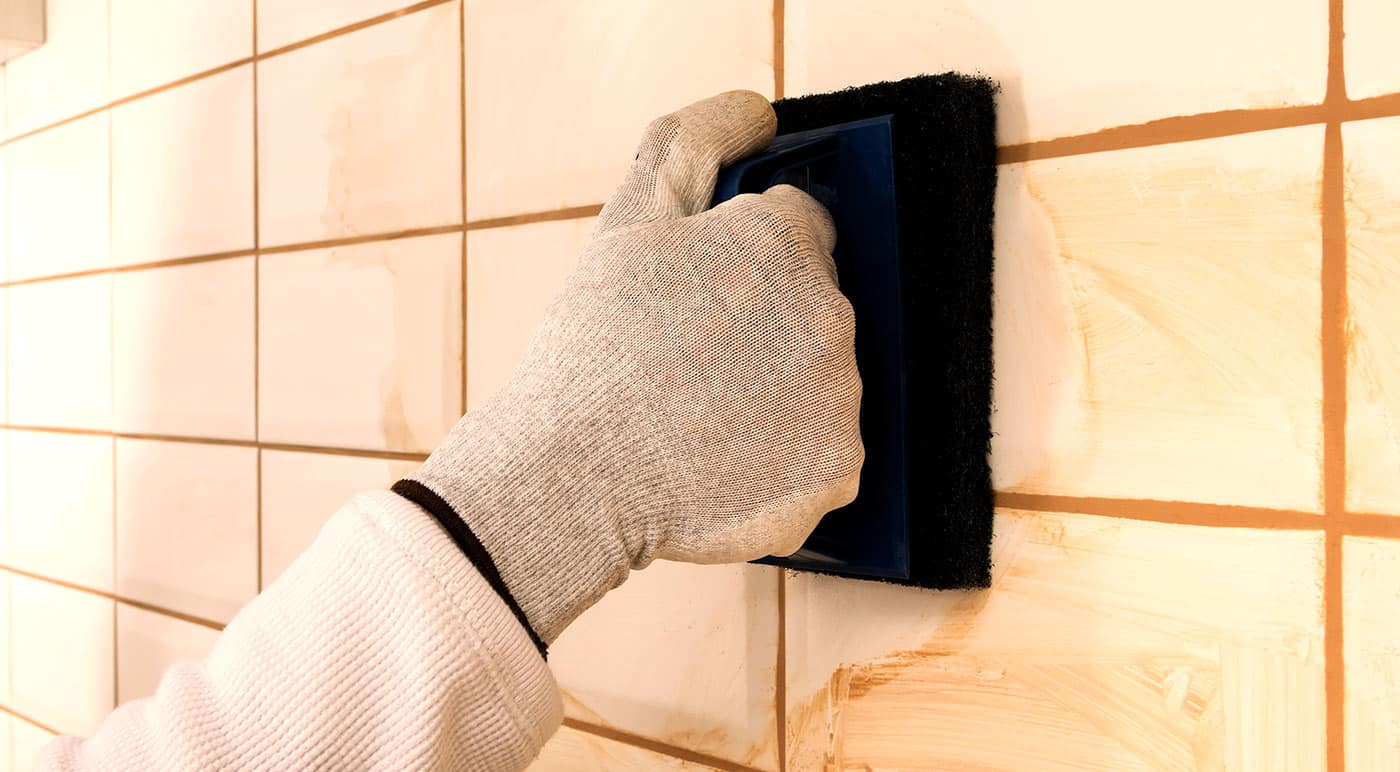
Using a special grout sponge that doesn’t hold very much water, wipe off the excess grout from your tiles, careful not to touch the set grout between the tiles as you go.
Grout Replacement Equipment List
- Oscillating Multi-Tool
- Grout Removal Blade
- Grout Float
- Grout Sponge
- 5 Gallon Bucket
- Flathead Screwdriver
- Grout Mix
Other Jobs For an Oscillating Multi-Tool
Demolition jobs like removing drywall, old vinyl floor, surgical cutting on baseboard or trim, dismantling old deck wood, cutting through nails embedded in wood pieces or walls.
Sanding projects such as furniture refinishing, paint prep for doors, shutters, or other home features that have narrow shaped and long edges.
Drywall cutting for small precision utilities such as a switch box, an exhaust vent or an outlet.

Click to Shop Power Tools